Details
Kaldera Prefab Painter is an Editor Extension made primarily for Level Design and scene creation.
In technical terms, it's a Unity Editor Window used to select and then instantiate Prefabs of your choice in the scenes. The editor allows you to create Palette and Palette Collection assets from the Asset -> Create menu and save them in your project. As they are Assets, they can (and should) be added to source control, such as GIT or SVN.
Internally, the Prefab Painter uses PrefabUtility.InstantiatePrefab(UnityEngine.Object assetComponentOrGameObject) to instantiate prefabs. This is a built-in Unity utility method and does the exact thing as if you were to drag Prefabs into your scene from the project view.
As a result, Unity is Agnostic to the editor. It does not know if the Prefabs have been placed using a custom Editor extension. You can remove the Editor without causing any damage to scenes painted with it.
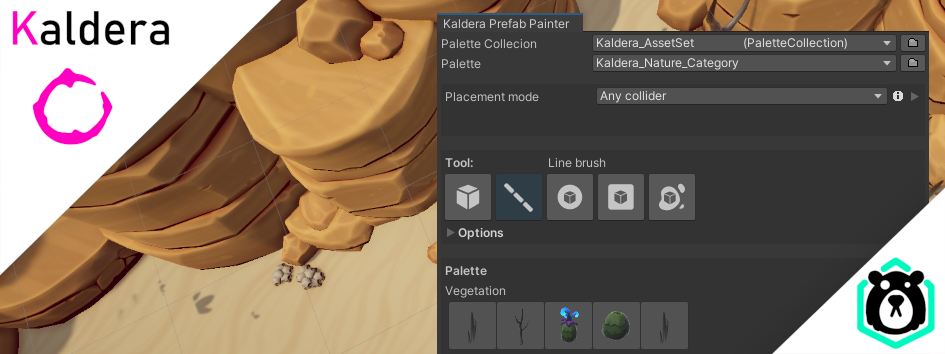
Palette Window
This Editor Window is the central part of the Prefab Painter. From the Palette Window, the prefabs in your Palette can be viewed as a collection of tiny prefab buttons, each with a preview image of the prefab, available for selection. The preview is there to let you see your current selection, and what prefabs you have available. By holding down Shift, multiple prefabs can be selected and painted together.
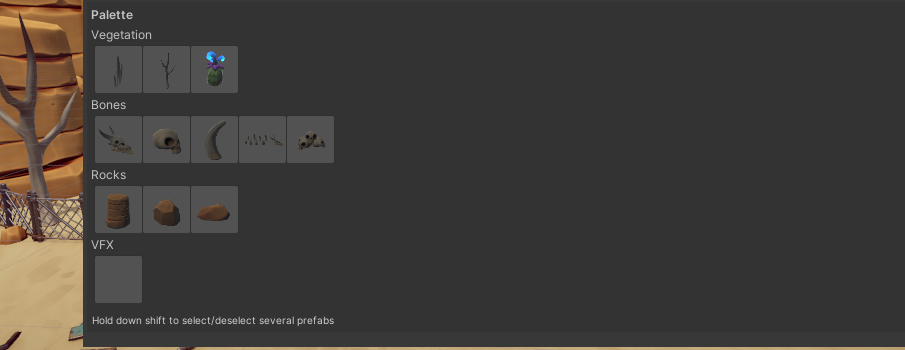
Prefabs split into named groups on display
General controls
The controls depend on the current brush. The instructions here are general, but won't apply to all brushes equally. We tried to make every brush as intuitive as possible within for its niche.
Since 1.4.0 most controls are editable from Edit -> Preferense -> Kaldera Prefab Painter. The settings are saved to the EditorPrefs on a per-machine basis.
Move the current brush within the scene
Left clickPaint with the current brush.
Left dragRotates the Brush in place towards the position of the mouse pointer.
Shift + Mouse movePre rotates the Brush towards the mouse pointer. Can still be moved after rotation.
Shift + Left DragRotates the Brush in place towards the position of the mouse pointer, but snaps to even 22.5 degrees in rotation.
Scroll WheelScales every prefab in the brush up or down, depending on the scroll wheel direction.
Shift + Scroll wheel (Paintbrush)Cycles among variants of the selected Prefab.
Shift + Scroll wheel (Area brushes)Randomizes a new brush stroke.
SpaceInstantly clears (deselects selected prefabs) the current Brush and gives back control to Unity. Use this when you want to stop painting for a moment.
Brushes
Included with the Prefab painters comes five different brushes for you to use directly from the Palette window.
Instantly paints a single prefab at the time at the position of the brush.
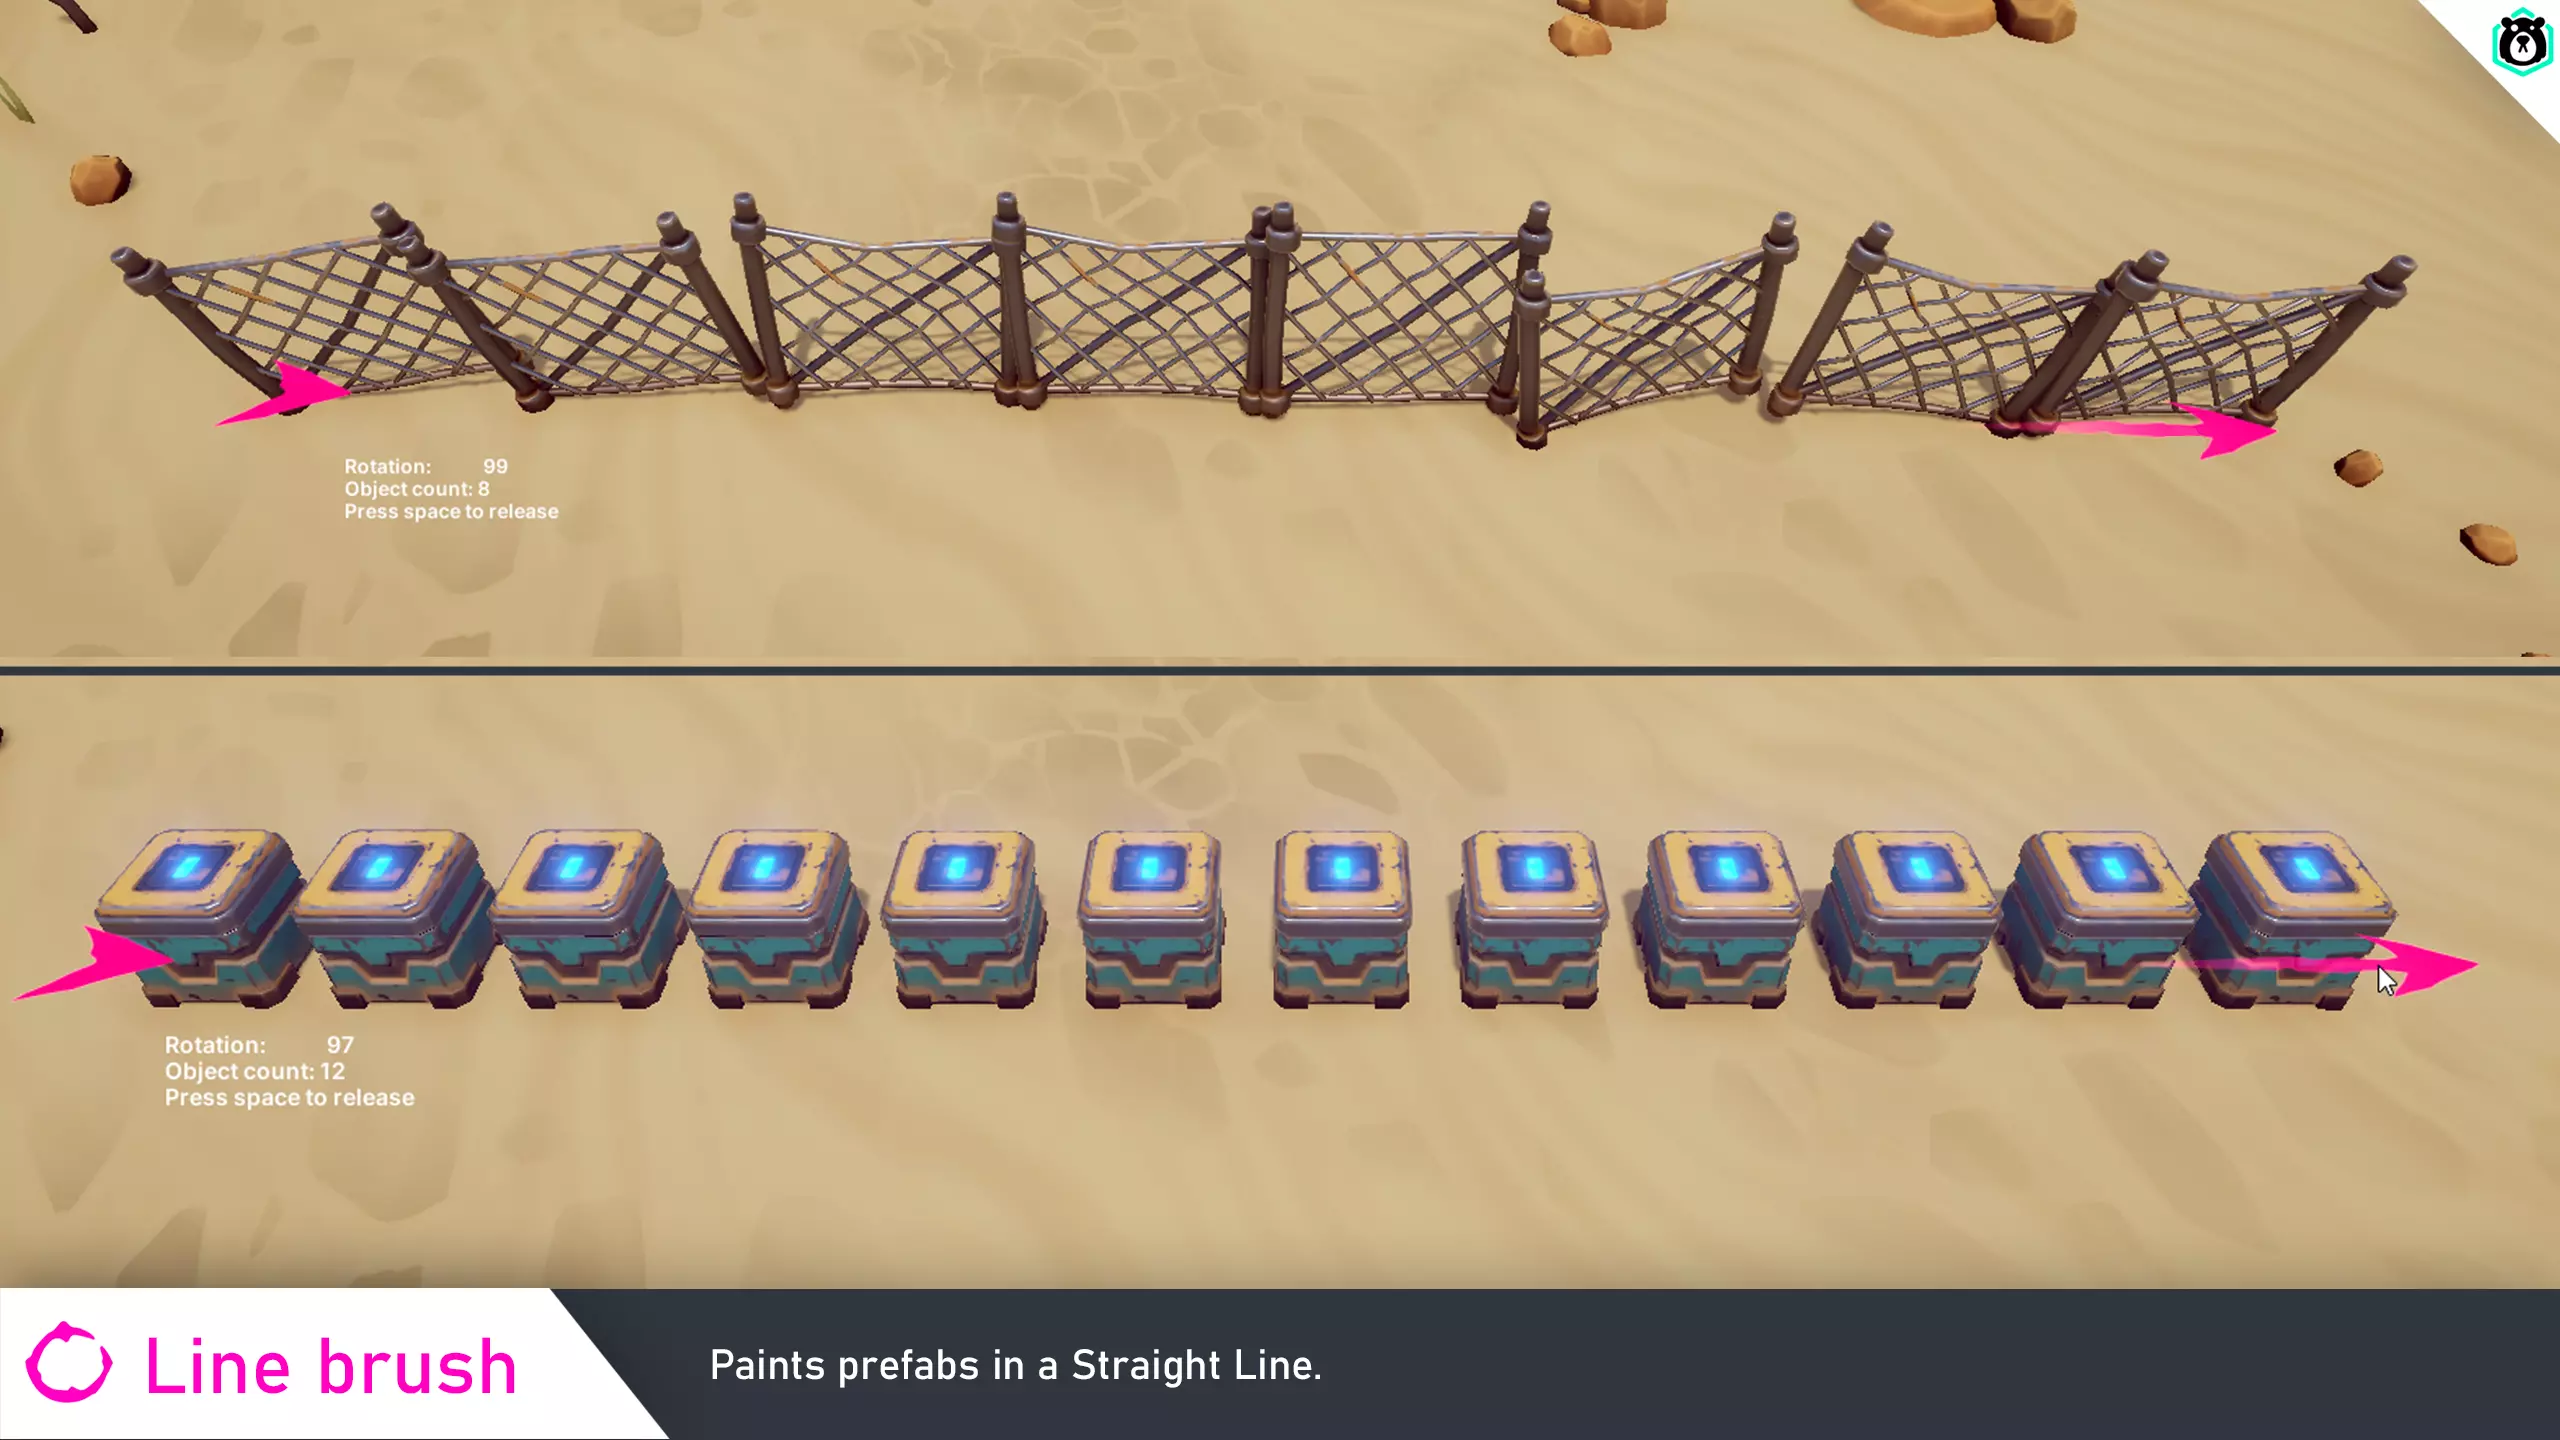
Paints a straight line of prefabs while dragging.
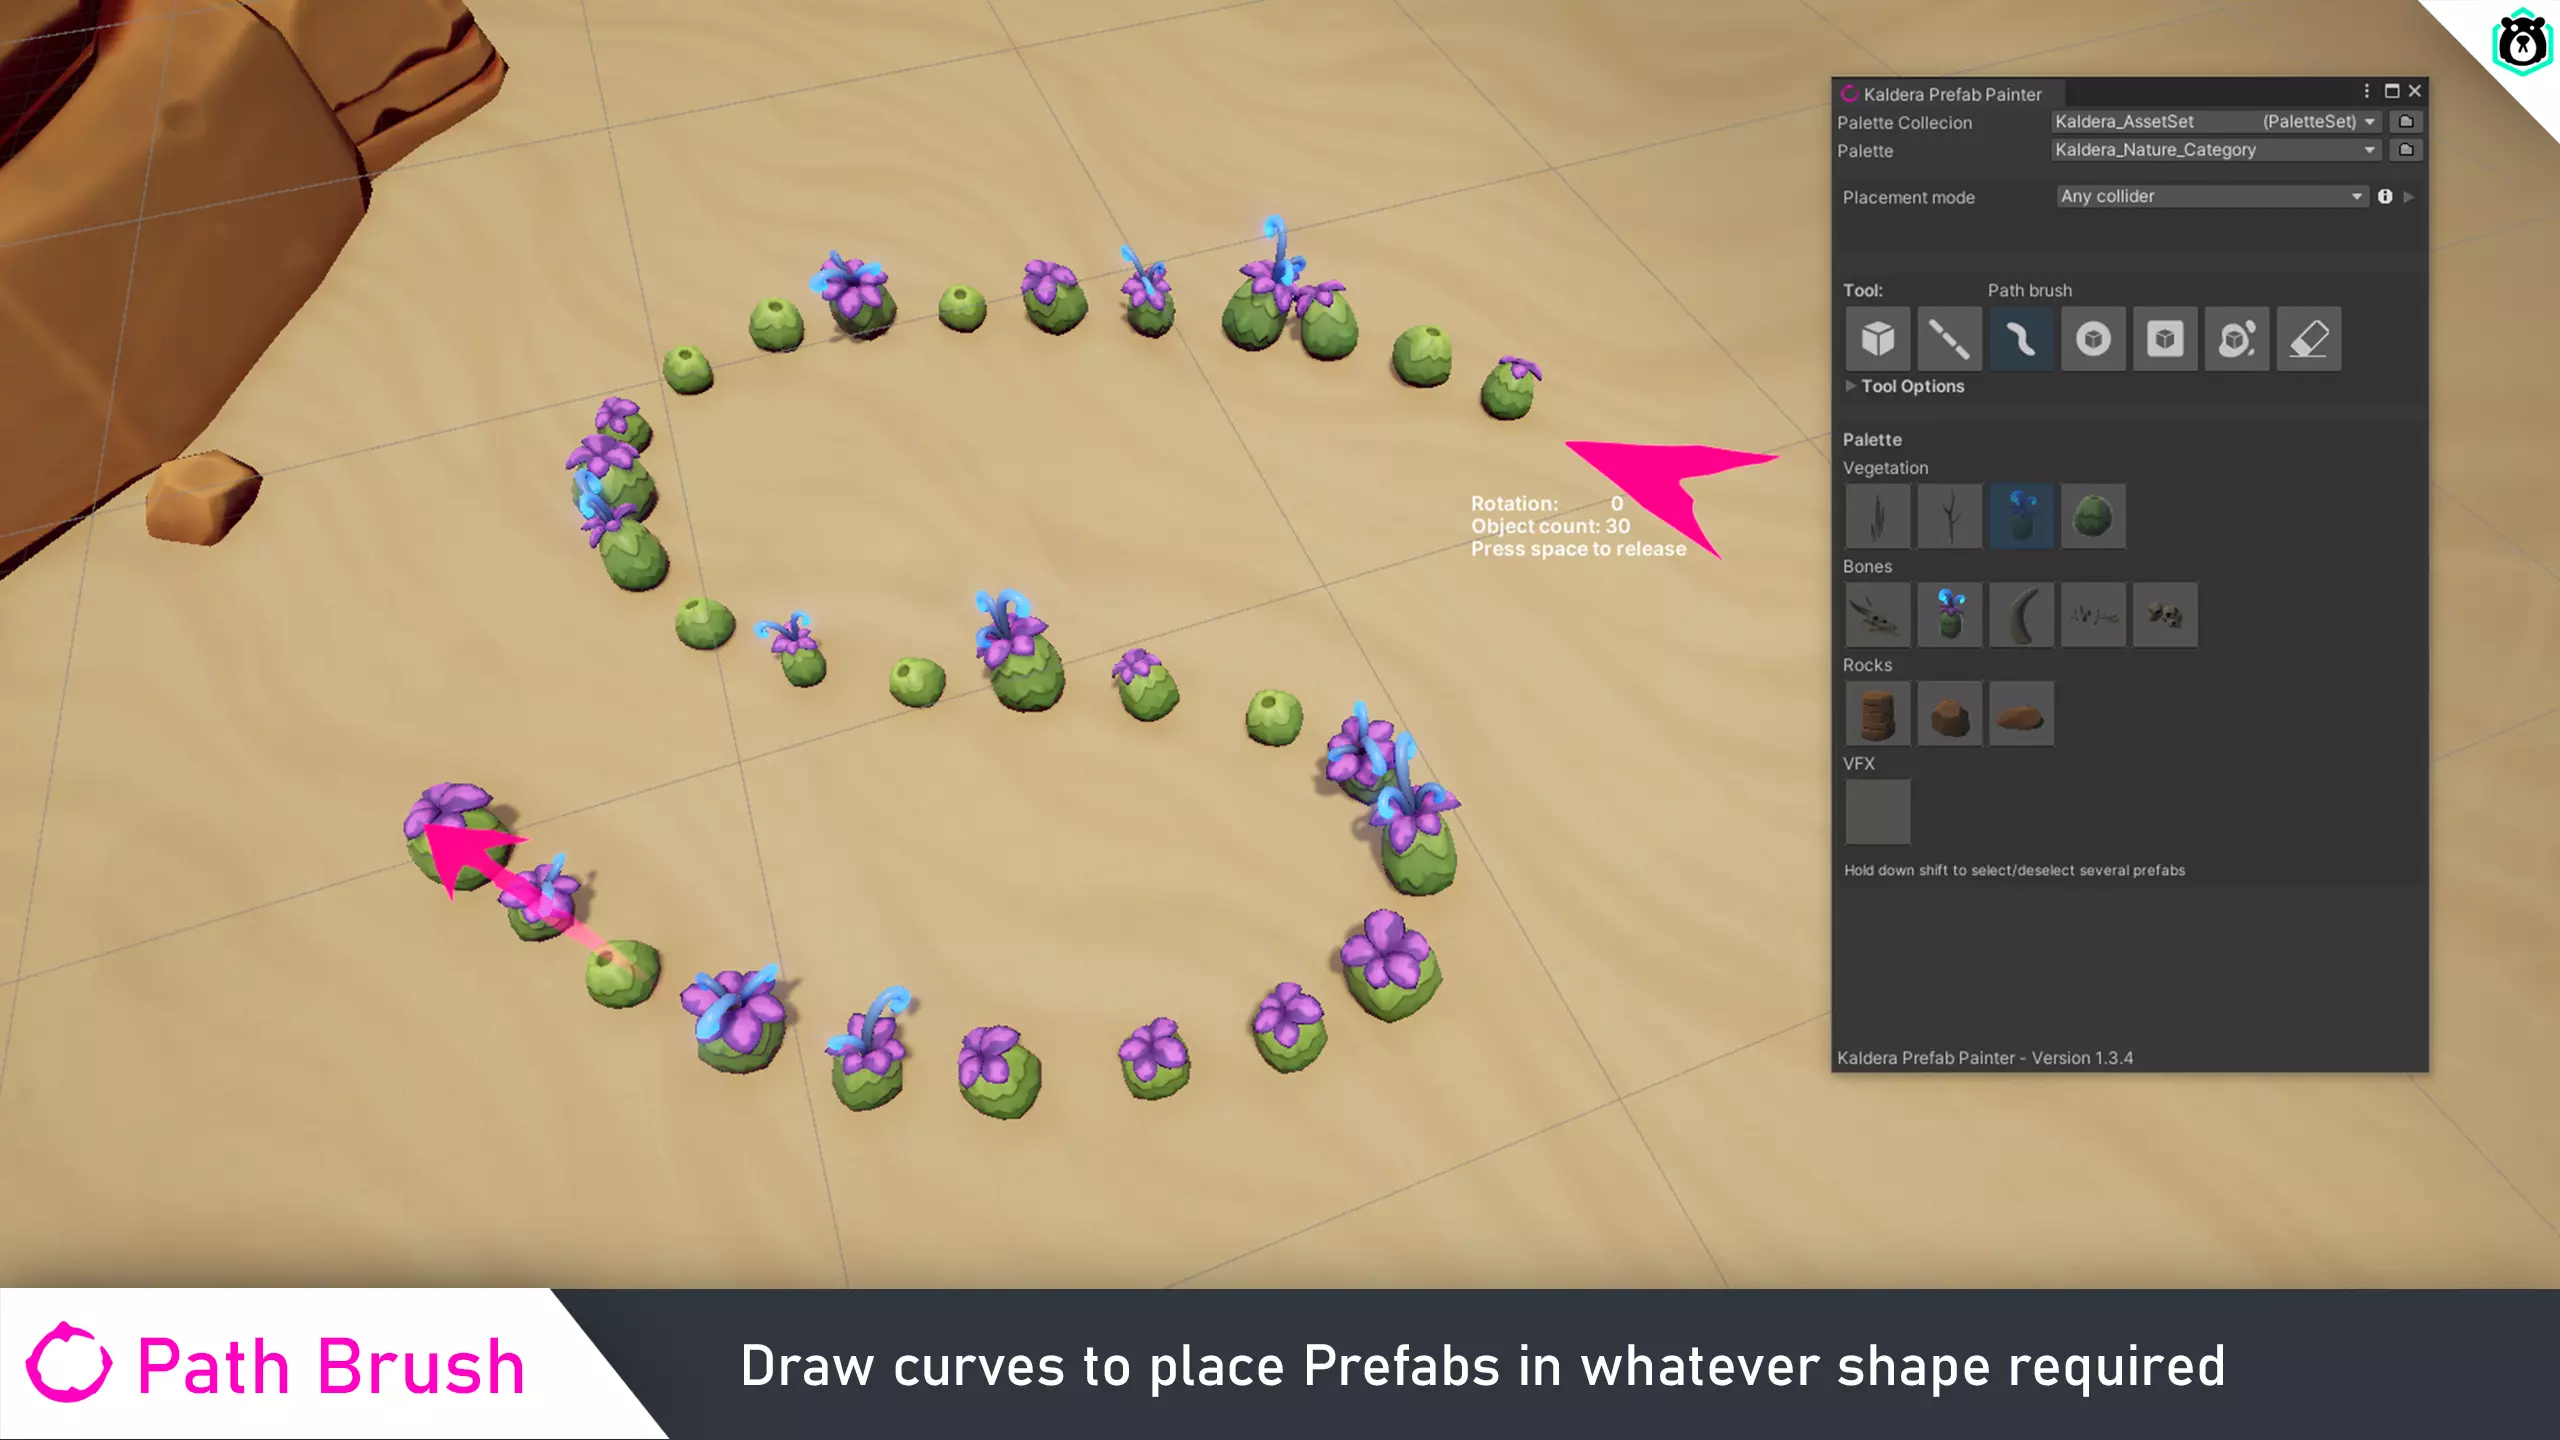
Paints a along a path determined by dragging the mouse.
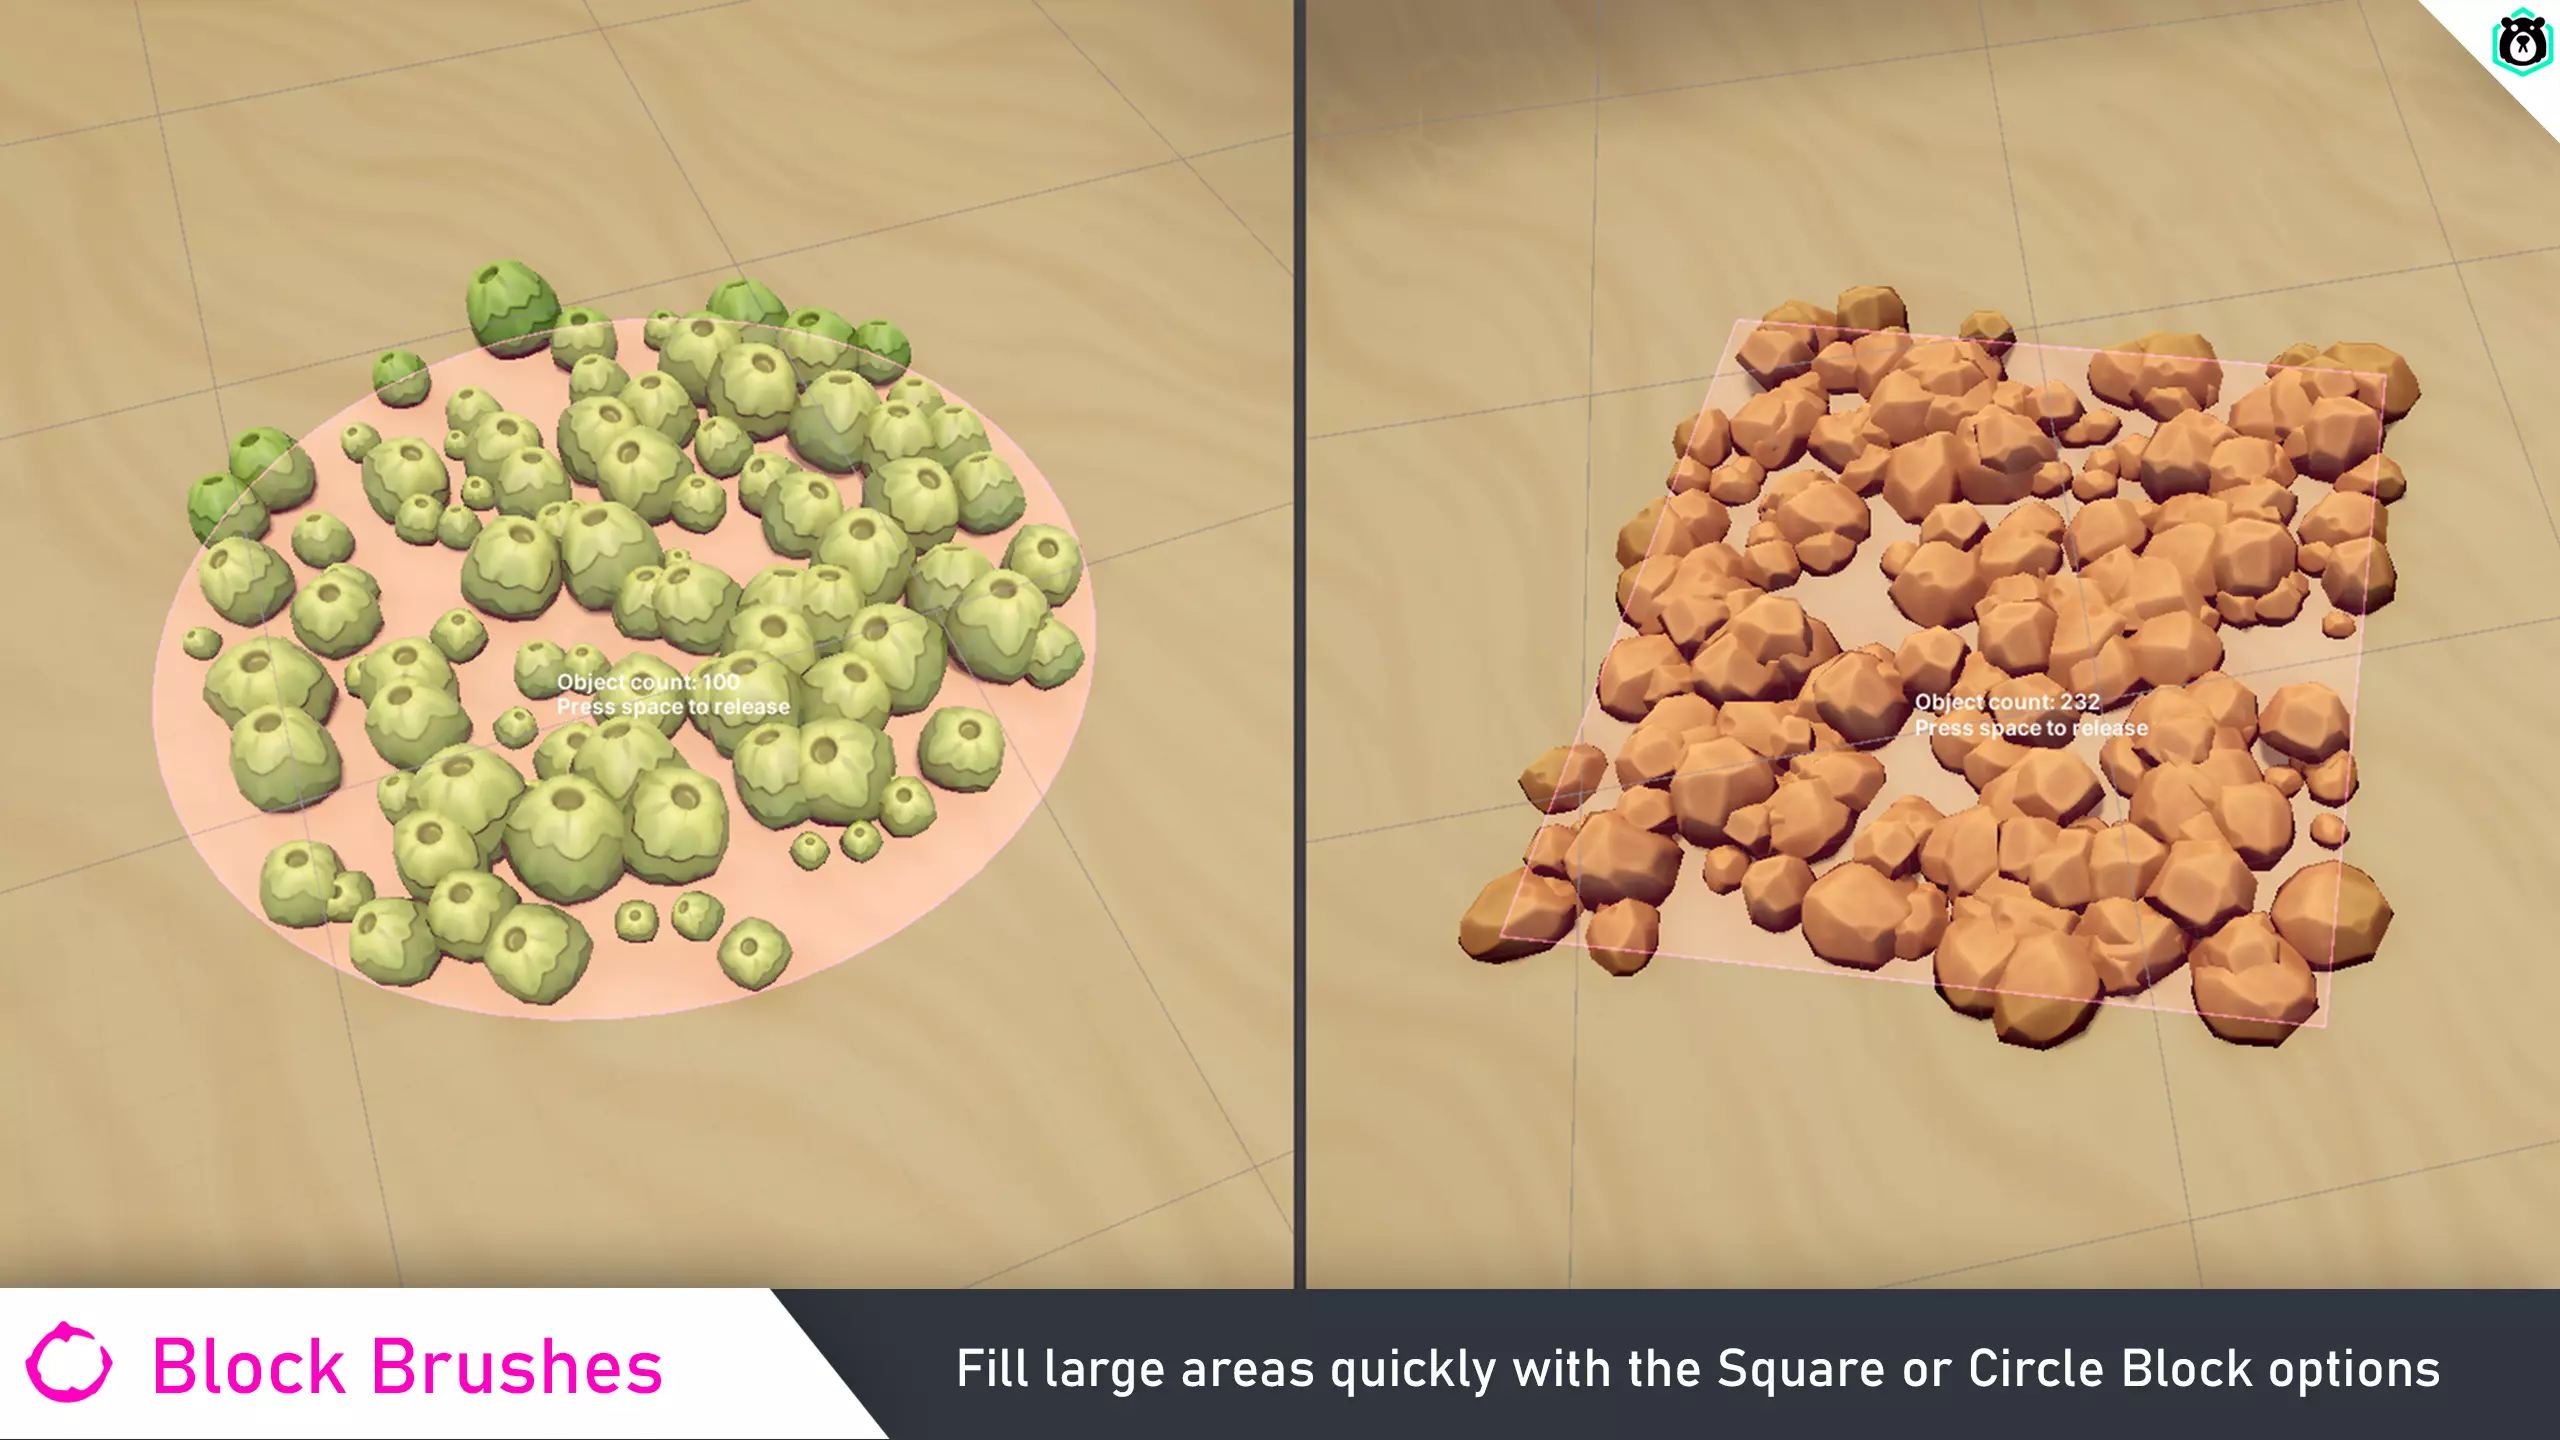
Instantly paints as many prefabs as fit within the boundaries of the circle.
Instantly paints as many prefabs as fit within the boundaries of the square.
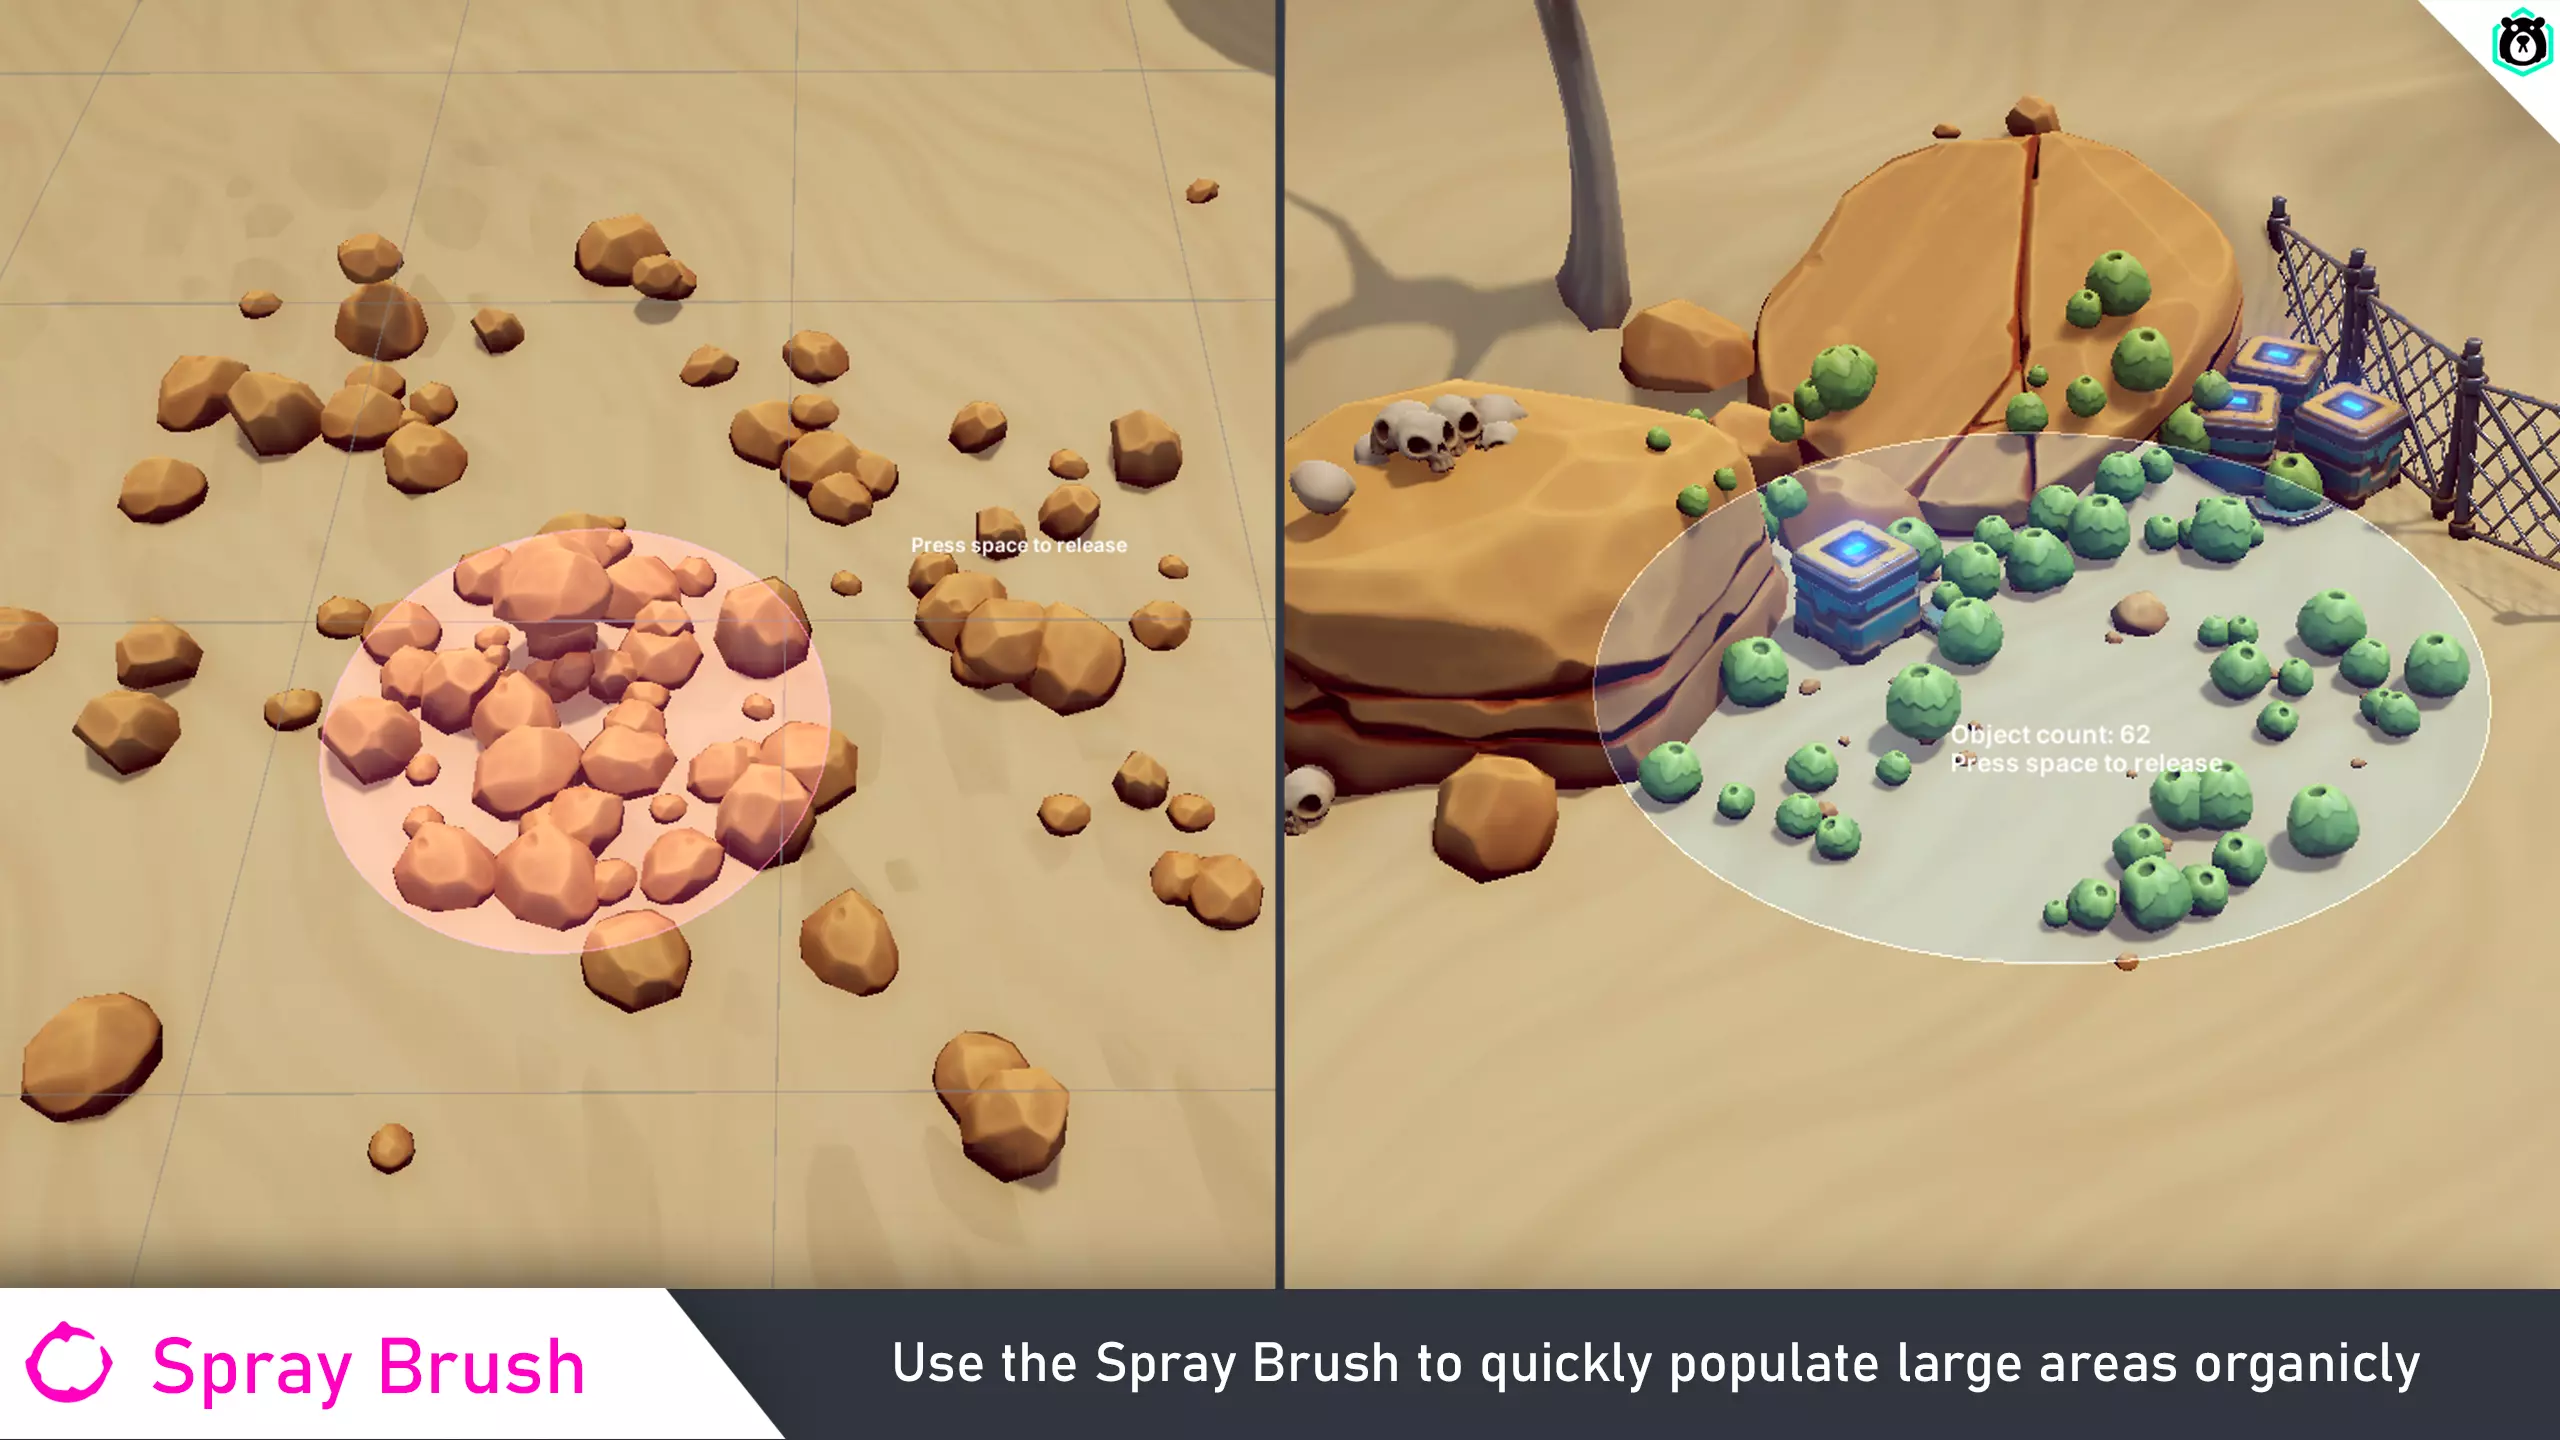
Continuously scatters prefabs within the bounds of the brush as long as you keep dragging the stroke.
Eraser gameobjects in the path of the eraser.

Note
You can implement your own custom brushes by inheriting from CollisionBear.WorldEditor.Brushes.BrushBase
Advanced options
Most brushes have their own sets of options. Some are shared between a few different brushes. We'll explain the most common ones.
Area brushes come with a distribution option, determining how they are spread out over the area.
Even Random (Area brushes only)The distribution of Prefabs within the brush is evenly spread out but with some randomness to it for a more "organic" look.
Perlin Random (Area brushes only)Randomized with the help of a Perlin noise map. Items spread out randomly but also have a tendency to cluster up in places.
Grid distributionThe distribution of Prefabs within the brush is spread out in an exact grid
Brush size (Area brushes only)Determines how big of an area the brush covers.
Prefab DensityDetermines how close prefabs are placed next to each other in the brush. Higher values generally mean more prefabs in the brush.
Orient to normalIf you have uneven ground, the Prefabs are placed perpendicular to whatever angle the ground has, as opposed to just pointing up.
Object LimitLimits the count of Prefabs generated in a brush stroke. This can be lowered to improve performance if that's an issue. We've set a hard limit of 100 objects.
Palettes
Palettes (not to be confused with the Palette window) are a selection of available Prefabs you want to make available for painting. The Palettes themselves are Assets that live in your Project, the same as any other scriptable object
You can create as many palettes as you like, and fill up a Palette with as many Prefabs as you like. We suggest having some sort of logical grouping of when assigning assets to a Palette, like Prefabs belonging to the same Biome or level type.
Within a Palette, Prefabs are grouped into, well, groups. The Palette window renders the groups on their own rows and is a great way to visually separate your Prefabs, making them easier to find.
Palettes are based on ScriptableObjects. They're serialized as YAML, which is a text format, per default. This makes these assets easy to have in Source control software such as GIT or SVN.
Prefab configuration
To help you with your workflow, the Prefabs in a Palette are customizable to a high degree on an individual level. Not all options are needed for all use cases, and the default values are usually good enough for an estimated half of all assets.
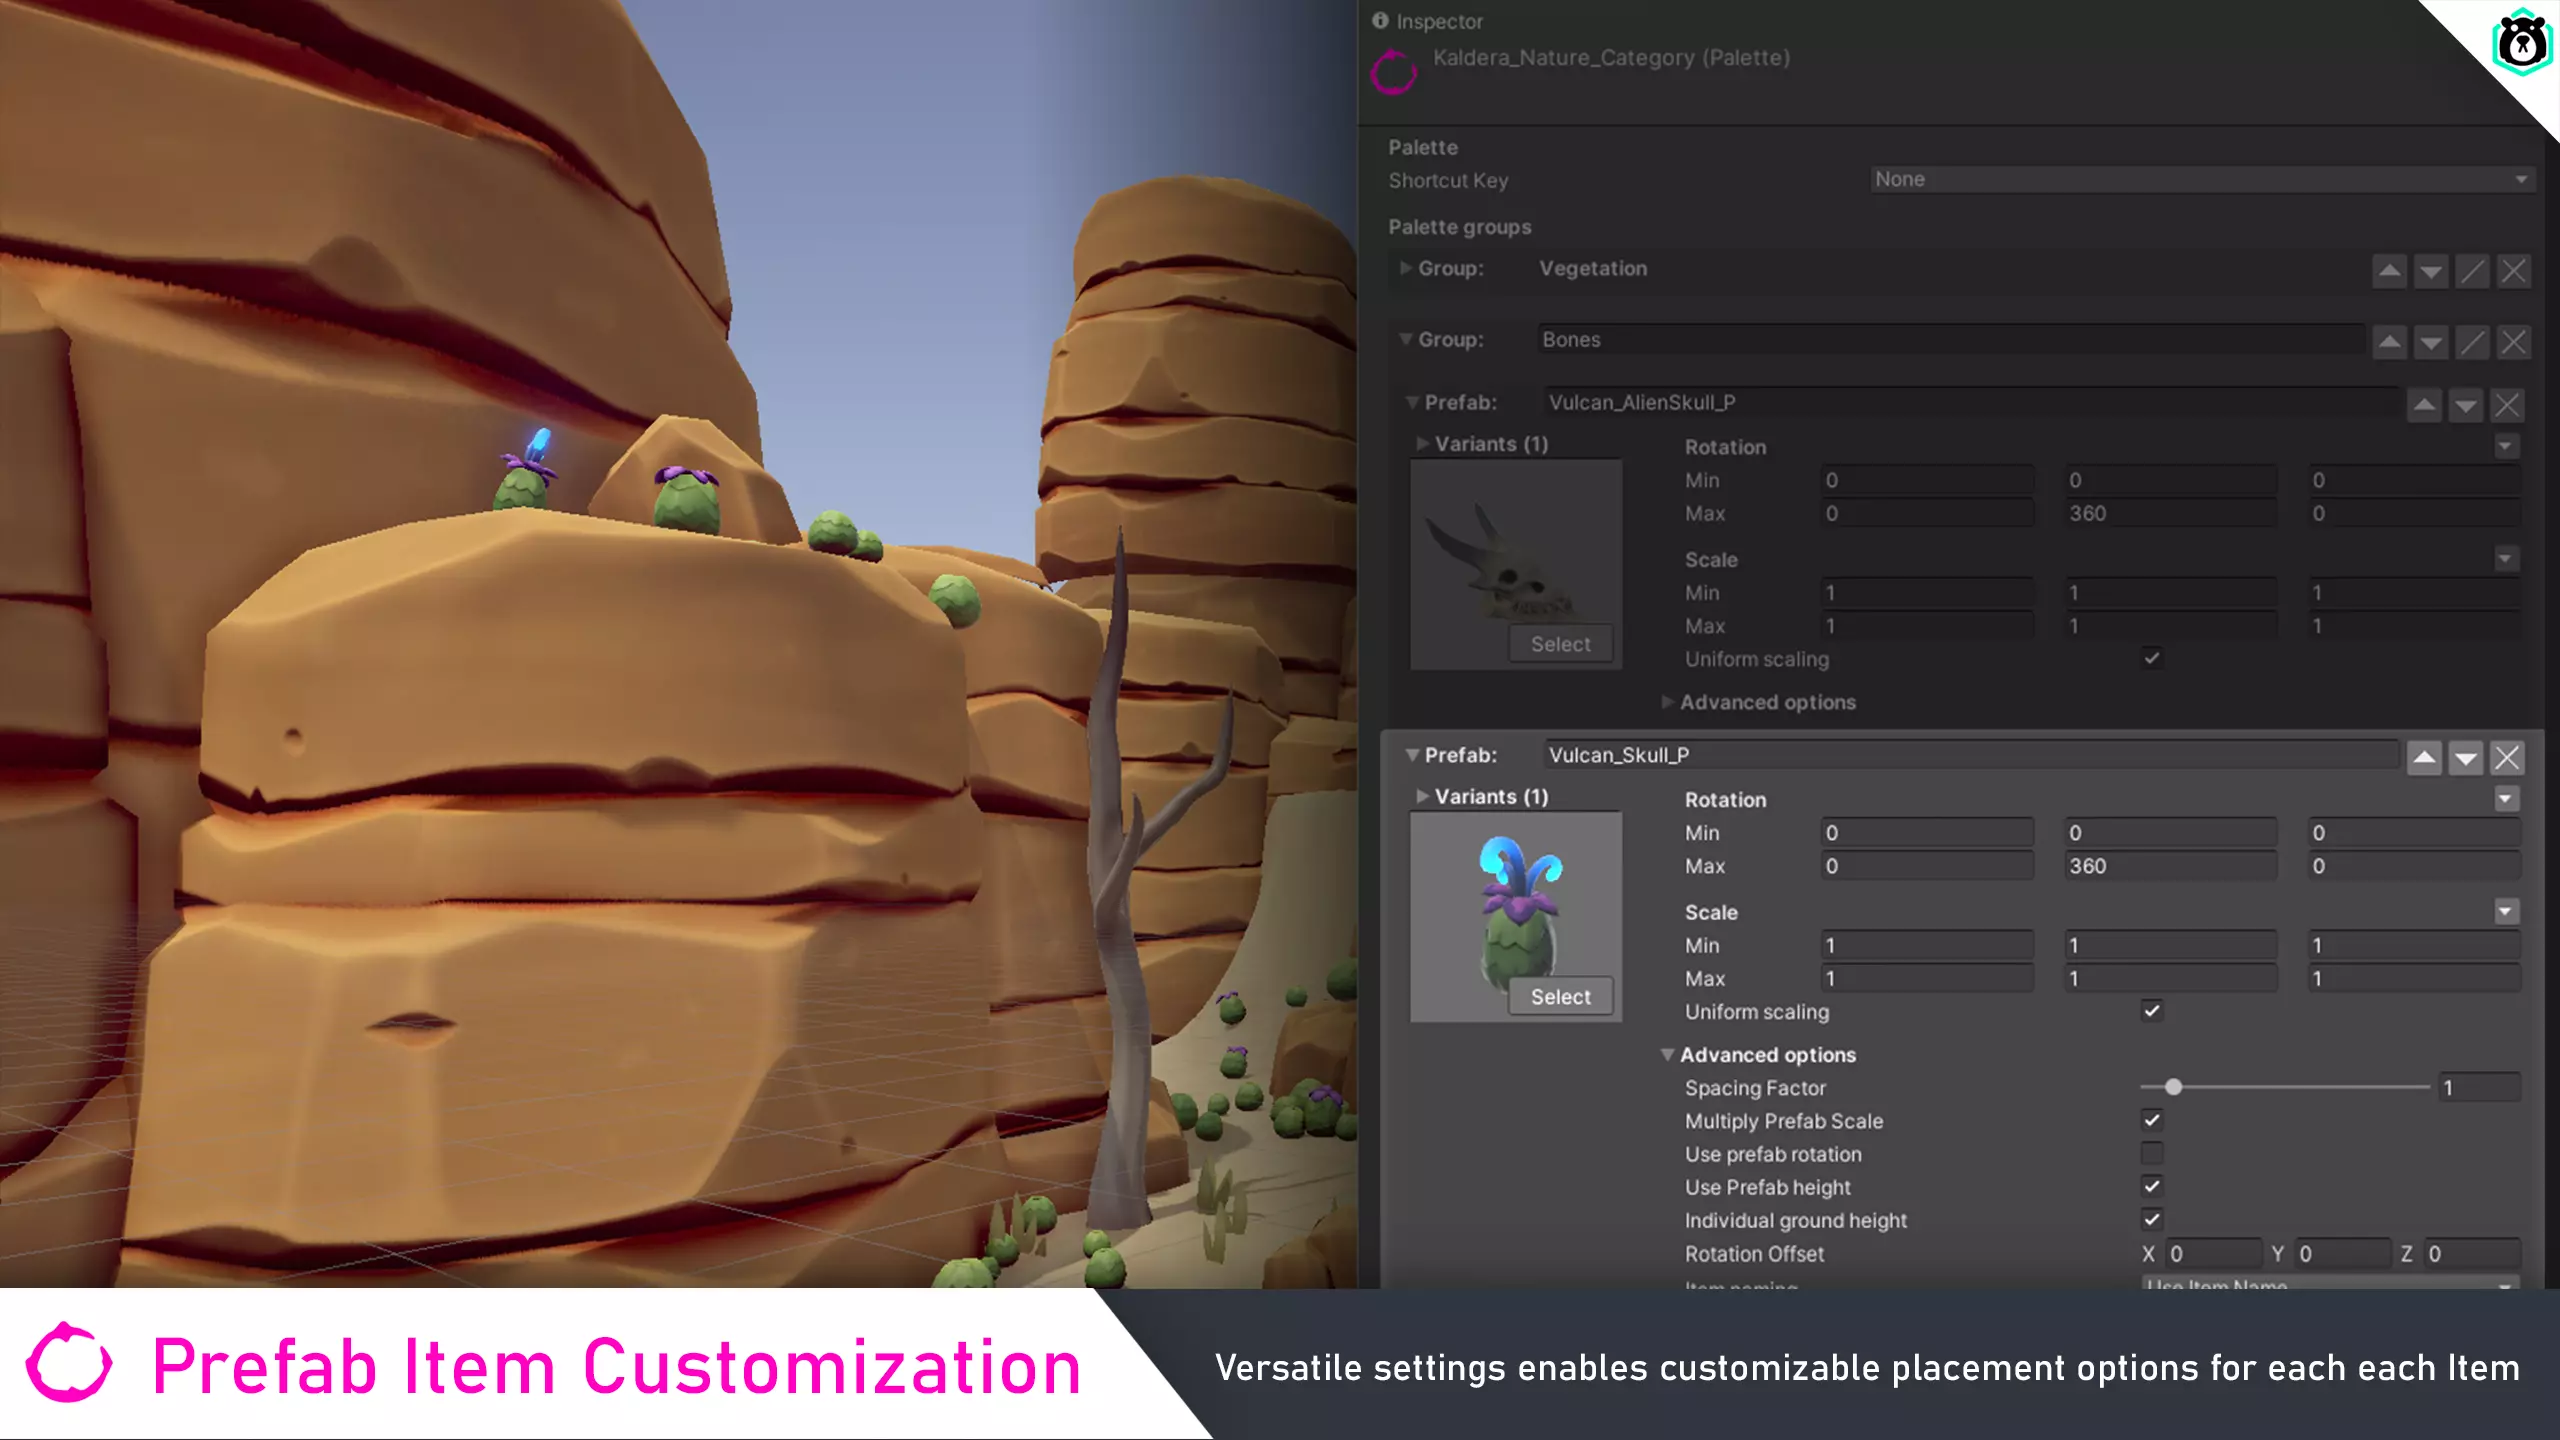
Specifies the limit for random rotation for each of the X, Y and Z axis.
ScaleSpecifies the limit for random scaling for each of the X, Y and Z axis. If Uniform scaling is checked, all axes will be scaled equally. Otherwise, they're randomized individually.
Spacing factorObject spacing (the distance between objects when painted) is based on the size of Prefab's Rendered components. The spacing factor gives the option to tweak the distance up or down.
Multiply Prefab scaleIf checked, take the scale of the Transform component of Prefab into consideration as the base for its scaling. Otherwise, default to a value of 1.0.
Use Prefab rotationIf checked, defaults any rotation to that of the Transform component's Rotation value. Otherwise, defaults to (0, 0, 0).
Use Prefab heightIf checked, the position of the Prefab placement is offset in height by the Prefab's Transform component's Position.y value. For example, if a Prefab has a position of (0, -5, 0) it will be placed 5 units below ground level.
Extra rotationRotation that is applied to any placements before any other rotation is done.
Individual ground heightIf checked, every Prefab in the brush does their own check against the ground to find what height they are to be placed at. Otherwise, the height is determined from the center of the brush.
Item namingDetermines how the instanced Prefab in the scene is named. Usually only relevant for Prefabs with multiple variants.
Prefab Variation sets
Despite its name, the prefab in the Palette is not limited to a single prefab object. You can configure a prefab variant set and group together similar prefabs. When painting with variants, the default behavior is to select a prefab at random from the variant set. This is a great and easy way to avoid the monotony of a scene.
Certain brushes allow for Variant cycling by using the Shift + Scroll wheel, giving you some control of what variant you end up painting anyway.
Rocks and foliage are situations where you often have large a amount of similar-looking meshes and you (usually) don't care which one's being painted.
These are great candidates for prefab variant sets. Group all similar-sized rocks together and paint them together.
Placement modes
In order to correctly place Prefabs at the right height in the scene, the Prefab painter uses a Raycast straight down into the ground, at the position of the prefab. Raycasts can only detect Colliders, so naturally, they can only find the height of objects with a Collider component.
Placement modes give you a few options for what the Raycast is allowed to collide with when determining the ground height.
Any ColliderAny collider in the scene works. Even Prefabs with colliders just recently painted included.
Parent colliderA single collider is selected from the scene. Great if you have a Terrain object or a single large plane.
Layer placementA single layer is selected. Any collider on that layer is picked up by the raycast. We suggest you create a special Layer, like a Ground layer, for easy use.
See also: Individual ground height option
Palette collection
If you have a large project with many assets, a single Palette might be overwhelmed with too many prefabs. Our solution to this is what we call a Palette Collection. This is exactly what it sounds like, a collection of Palettes. When using a Palette Collection, you can quickly switch between the palettes in the collection either by using their hotkey or from the dropdown.
Note
All Palette hotkeys are prefixed with Shift.
Setting the Hotkey to F turns into Shift + F


